Install / Deploy
Pre-Installations for SAP CLI Environment
Install the required tools before deploying any BDM application:
| Tool | Command |
|---|---|
| Cloud Application Model CLI | npm i -g @sap/cds-dk |
| Cloud MTA Build Tool | npm install -g mbt |
| MTA Plugin for CF CLI | cf install-plugin multiapps |
| HTML5 Applications Repository Plugin | cf install-plugin -r CF-Community "html5-plugin" |
If the CF-Community repository is not registered:
cf add-plugin-repo CF-Community https://plugins.cloudfoundry.org
Setting make File Path in Environment Variables:
- Download
make.exe. - Open Environment Variables for your account.
- Edit the
Pathvariable → click New → add the path tomake.exe→ click OK.
Deploy Frontend React App (Vite) to SAP BTP
Prerequisites
- SAP BTP account with Cloud Foundry enabled
- Cloud Foundry CLI installed
- Node.js and NPM installed
- Vite-based React project
Steps
1. Build the Vite app for production:
npm run build
This creates a dist folder with the production build.
2. Create Staticfile in the dist folder:
pushstate: enabled
This ensures client-side routing works correctly after deployment.
3. Create manifest.yml in the project root:
applications:
  - name: your-app-name
    path: ./dist
    memory: 128M
    buildpacks:
      - staticfile_buildpack
    routes:
      - route: your-app-name.cfapps.eu10-004.hana.ondemand.com
    default-route: true
| Field | Description |
|---|---|
name | Unique app name in SAP BTP |
path | Must point to the dist folder |
buildpacks | staticfile_buildpack for static frontend apps |
4. Login to Cloud Foundry:
cf login -a https://api.cf.<region>.hana.ondemand.com
Replace <region> with your BTP region (e.g., eu10, us10). Enter credentials and select your org and space.
5. Push the app:
cf push
Cloud Foundry will use manifest.yml and output a URL for your app.
Troubleshooting:
| Issue | Fix |
|---|---|
| Buildpack errors | Verify the staticfile_buildpack URL is correct |
| Routing issues | Confirm pushstate: enabled is set in the Staticfile |
Creating and Deploying an MTA Application
1. Download the sample MTA application from the provided App_React_SAP link.
2. Update mta.yaml: Replace app with your application name.
app_approuter → cw_workrules_approuter
3. Update package.json: Replace app with your application name.
app-mta → workrules-mta
4. Update xs-security.json: Change xsappname to your application name (as in mta.yaml).
app → cw_workrules
If using an existing XSUAA instance, use the xsappname from BTP mapped to that instance.
5. Update xs-app.json (app-router): Change target to your application name.
6. Copy your React app's build folders into the webapp folder of the newly created application.
7. Update the manifest file in the React app's public folder: Change the id to match the target name in xs-app.json.
8. Build and deploy:
cd <webapp-folder>
npm install
npm run build
cd ..
mbt build
A mta_archives folder is generated containing a .mtar file.
cf login -a <api-endpoint> -u user@incture.com -p <password>
cf deploy mta_archives/<your-file.mtar>
Frontend Deployment Steps (BDM UI)
- Open Command Prompt at the project root.
- Navigate to UI deployer folder:
cd Demo_ui_deployer - Delete existing resources (PowerShell):
rm resources - Navigate back to root:
cd .. - Build the MTA archive:
mbt build - Login to Cloud Foundry:
cf8 login -a https://api.cf.eu10-004.hana.ondemand.com - Deploy the application:
cf8 deploy mta_archives\BDM_0.0.8.mtar
Note (If Build Fails Due to Memory Issue):
set NODE_OPTIONS=--max-old-space-size=32768
SAP BTP: Business Accelerator Hub (BAH)
- URL: https://api.sap.com/
- CRUD destinations are managed in the Sub-Account (changes made by the SAP Ops Team).
Steps:
- Go to SAP BAH and search/select Destination Service (Cloud Foundry).
- Select the Try Out tab and select or create an environment.
- Select Add New Environment and provide details from the Service Key:
| Field | Value |
|---|---|
| Starting URL | uri |
| Client Id | clientid |
| Client Secret | clientsecret |
| Subdomain | identityzone |
- Click Configure.
- Use the APIs on the left panel to perform required actions.
BDM Backend Deployment
SAP BTP Level Changes
- Get access to the required space in SAP BTP.
- Create required service instances from the Service Marketplace (SAP Ops Team).
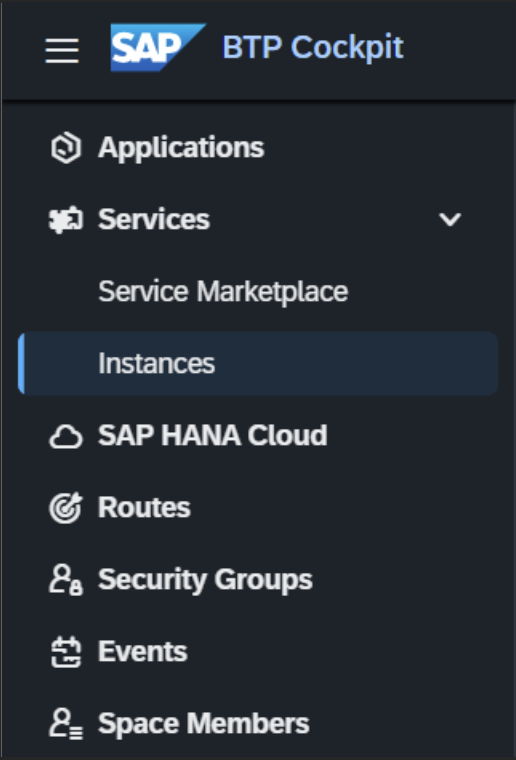
- Current BDM services in
Incture-Cherrywork-DEV/CW-BDM-DEV:xsuaa,dms,schema,destination
- Current BDM services in
- Add those services in
manifest.yml. - After deploying, note the Application Routes (backend endpoint URL).
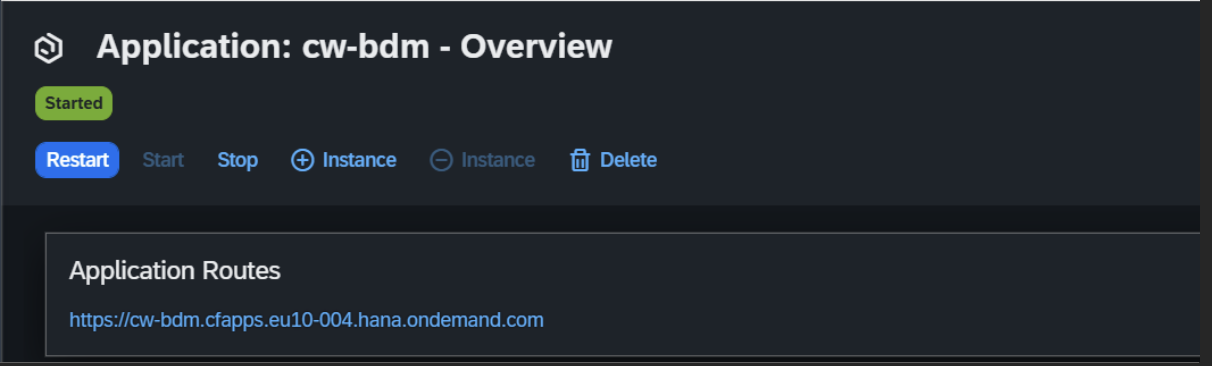
- Create a destination (SAP Ops) so the frontend can access the backend:
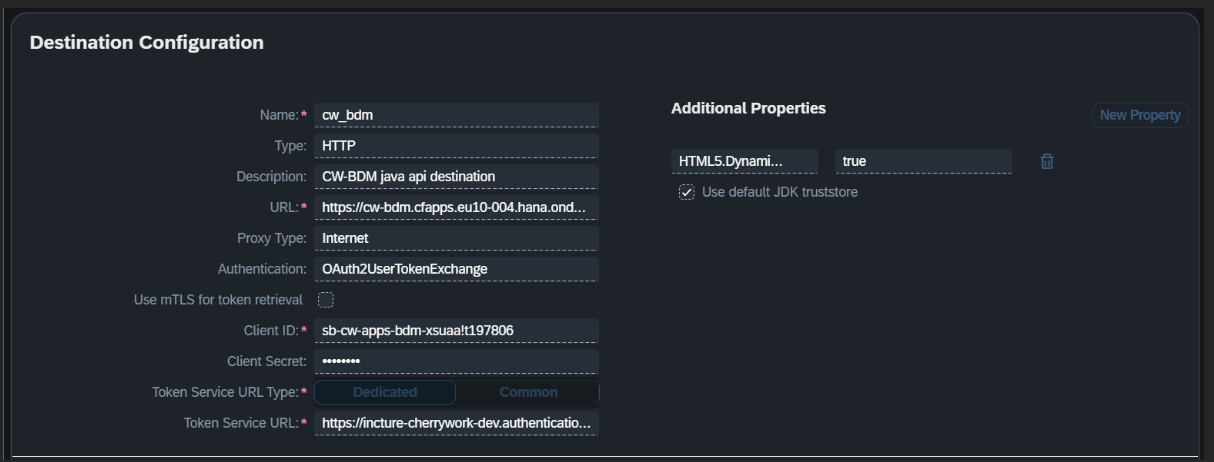
| Field | Value |
|---|---|
| Name | Unique name to identify the destination |
| URL | Deployed backend URL |
| Authentication | UserTokenExchange (for user details) or ClientCredentials |
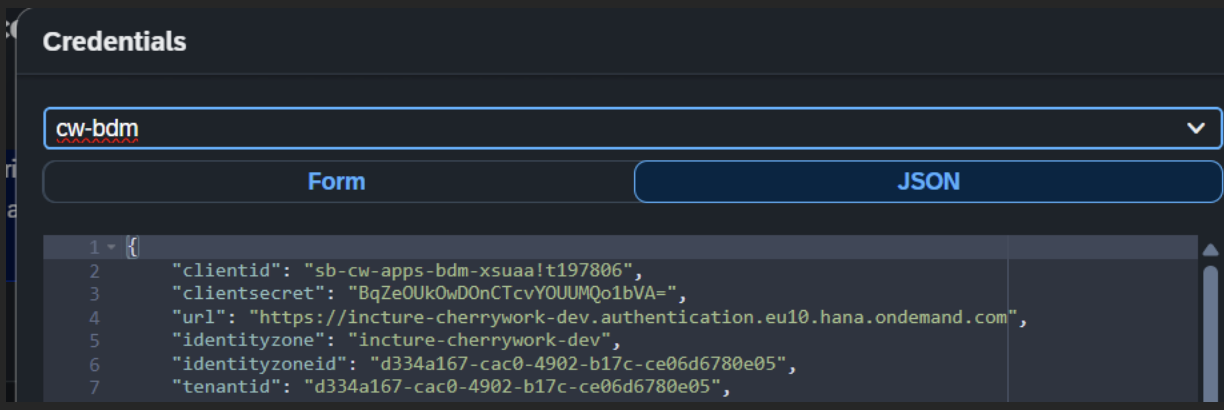
| Client ID | clientid from the XSUAA bound to the backend app |
| Client Secret | clientsecret from the XSUAA bound to the backend app |
| Token Service URL | XSUAA url + /oauth/token |
Code Level Changes
- In
application.properties, comment out local spring profiles and uncomment deployment profiles. - Run Maven clean and install — a JAR file is created in the
targetfolder. - Make required modifications in
manifest.yml. - Ensure Cloud Foundry CLI (
cf8) is installed, then run:
# Login to the required subaccount
cf8 l -a {subaccount-API-Endpoint}

# Deploy the JAR to the space
cf8 push -f manifest.yml -t 180 -i 1